Installing uKnowva yourself is extremely easy. You only need to install the required software and follow 4 simple steps and uKnowva will be ready for you to use.
System Requirements
To successfully install and use the uKnowva you must have a fully operational web server (Apache or IIS), a database (MySQLis the optimum) and the server side scripting language PHP. Following are the system requirements:
| Software | Minimum Requirement | Recommended | Download Link |
| PHP | 5.0 | 5.3.x | http//php.net |
| MySQL | 3.23.x or above | 5.0 |
http://dev.mysql.com/downloads/mysql/5.0.html You can also go for a licensed Mysql server to ensure better security. You can read more on: http://www.mysql.com/about/legal/licensing/oem/ |
| Apache | 1.3 or above | 2.2 | http://httpd.apache.org |
| IIS | 6 | 7 | http://www.iis.net/ |
Minimum 20 GB hard disk space shall be required for the application to run smoothly.
Installing Server Software
Next, you have to install server software for your system. For Windows, this will be WAMP or XAMPP and for Linux it will be LAMP.
Follow the instructions to install WAMP, XAMPP, and LAMP, respectively.
- WAMP: http://tenfouragency.com/setting-up-a-wamp-local-server-on-windows-7/ OR http://www.youtube.com/watch?v=kW-4WWcqjkE
- XAMP: https://www.udemy.com/blog/xampp-tutorial/ OR http://www.youtube.com/watch?v=kSvmYhxHJnk
- LAMP: https://www.digitalocean.com/community/articles/how-to-install-linux-apache-mysql-php-lamp-stack-on-centos-6 OR http://www.youtube.com/watch?v=R_PKVBFNeJk
Extracting Installer Files
After installation of the suitable software, save the provided uKnowva Installer in the root folder. For WAMP, it is “www,” for XAMPP it is “htdocs,” and for LAMP it is “/var/www.”
Extract the installer into the root folder.
Installing uKnowva
Step 1
In your browser, open the root folder. The following page opens.
If your files have been saved in another folder inside the root folder, open that foder. You have to type “localhost/folder_name”
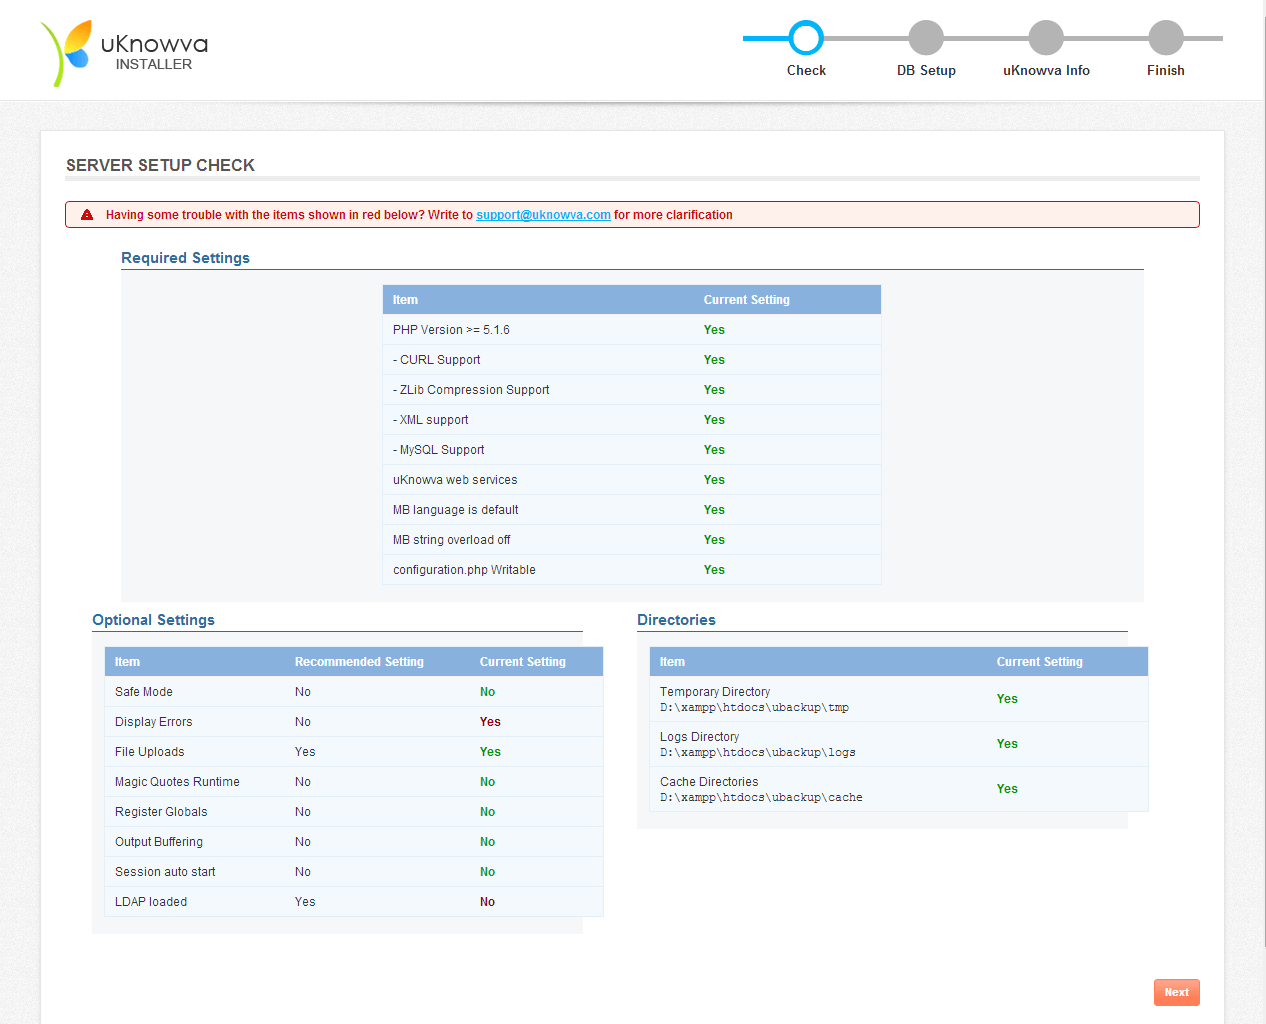
You have to make sure that all the services under Required Settings show “Yes.” uKnowva Web Services has to display “Yes” if not, then make sure you are connected to the internet.
You can change the settings as required under Optional Settings. Set the directories as required and click “Next.”
Step 2
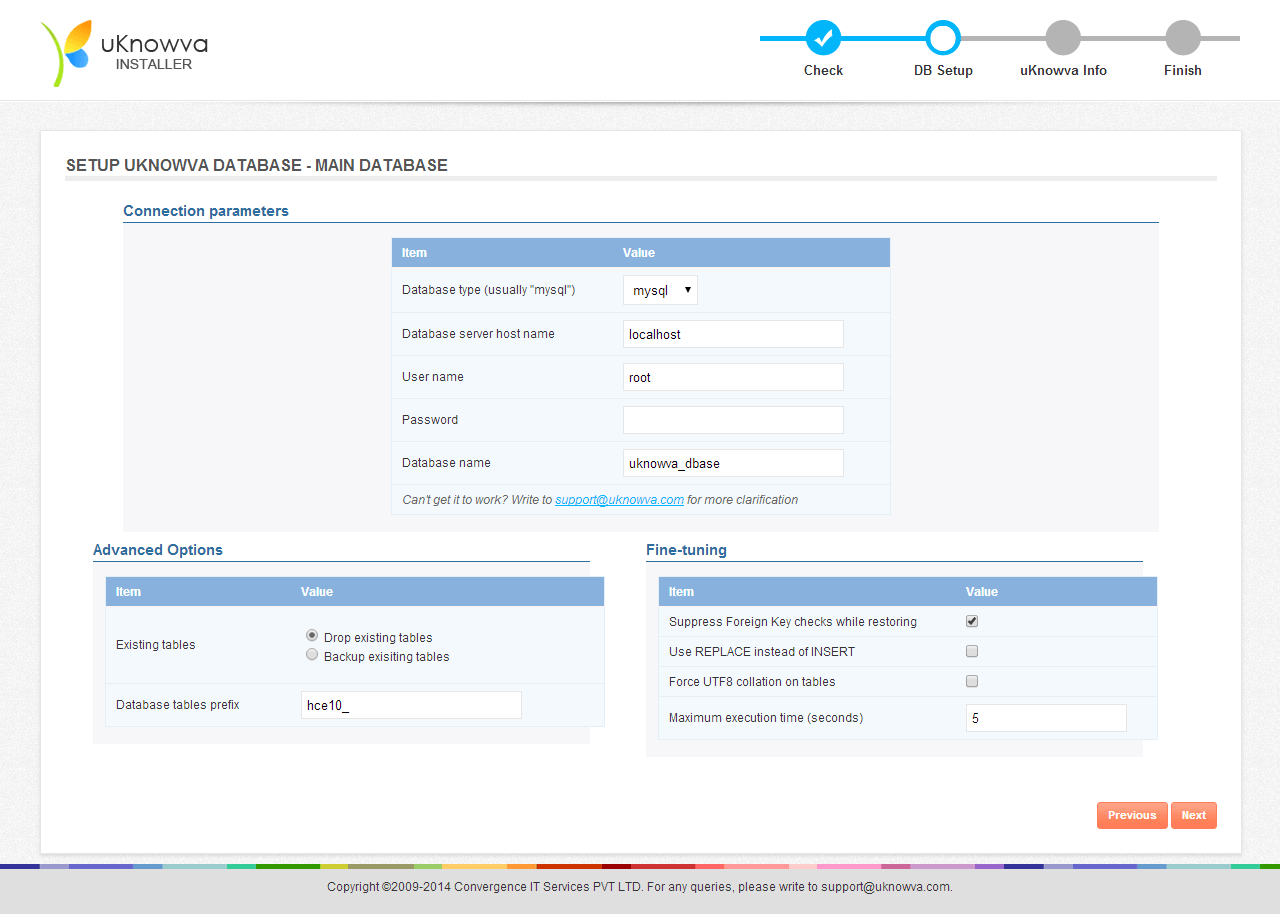
You have to now set up the main uKnowva database for your instance. You may leave the Password field blank. A default password will be assigned.
You can set your database name and tables prefix here.
Click Next to proceed to the next step.
Step 3
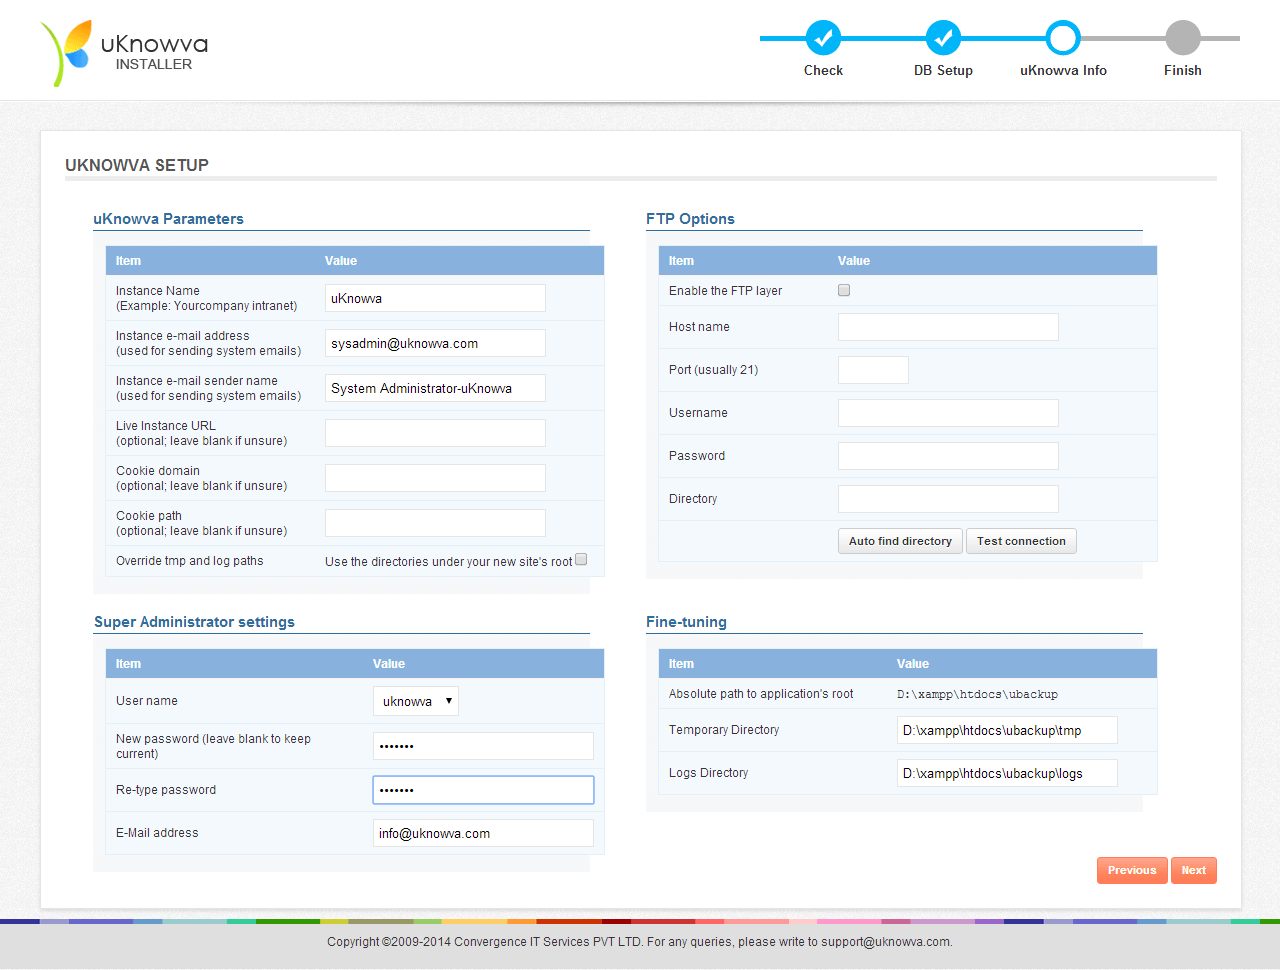
In this step, you will set your instance parameters and Super Administrator’s settings. Give your instance a name, set its email address and the sender name.
Once done, click Next.
Step 4
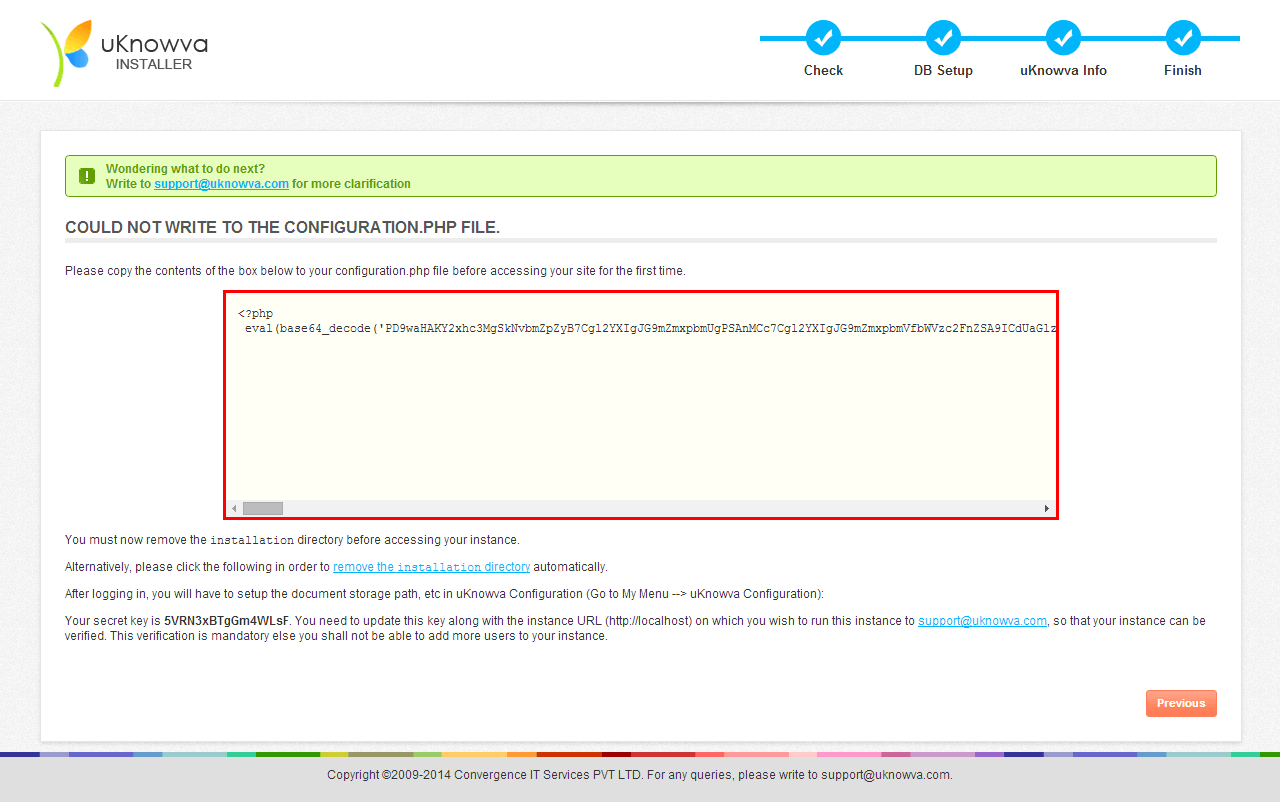
In the final step, you may get this message. In such a case, follow the instructions on the screen and paste the given code in the “configuration.php” file.
Then, remove the installation directory from your folder before accessing your instance for the first time.
You are now ready to start using your instance of uKnowva!